How to Use Glindra AI in Google Slides

How to use Glindra AI Add-on (Step-by-Step Tutorial)
1. Install the add-on
1. Go to the Glindra add-on page in Google Workspace Marketplace.
2. Click Install.
3. Choose the Google account you want to use with Glindra.
4. Review the permissions.
5. Click Allow to complete the installation.
2. Click Install.
3. Choose the Google account you want to use with Glindra.
4. Review the permissions.
5. Click Allow to complete the installation.

2. Open Google Slides
1. After installation, open Google Slides
2. Open an existing presentation or create a new blank presentation.
2. Open an existing presentation or create a new blank presentation.

3. Launch Glindra and open the Generator
1. In Google Slides, go to the top menu and click Extensions.
2. Find “AI Presentation PDF to Slides, Rewrite & Translate”
3. Hover over it and click “GlindraAI Generator”
This will open the Glindra AI Generator popup where you can create your first presentation.
2. Find “AI Presentation PDF to Slides, Rewrite & Translate”
3. Hover over it and click “GlindraAI Generator”
This will open the Glindra AI Generator popup where you can create your first presentation.
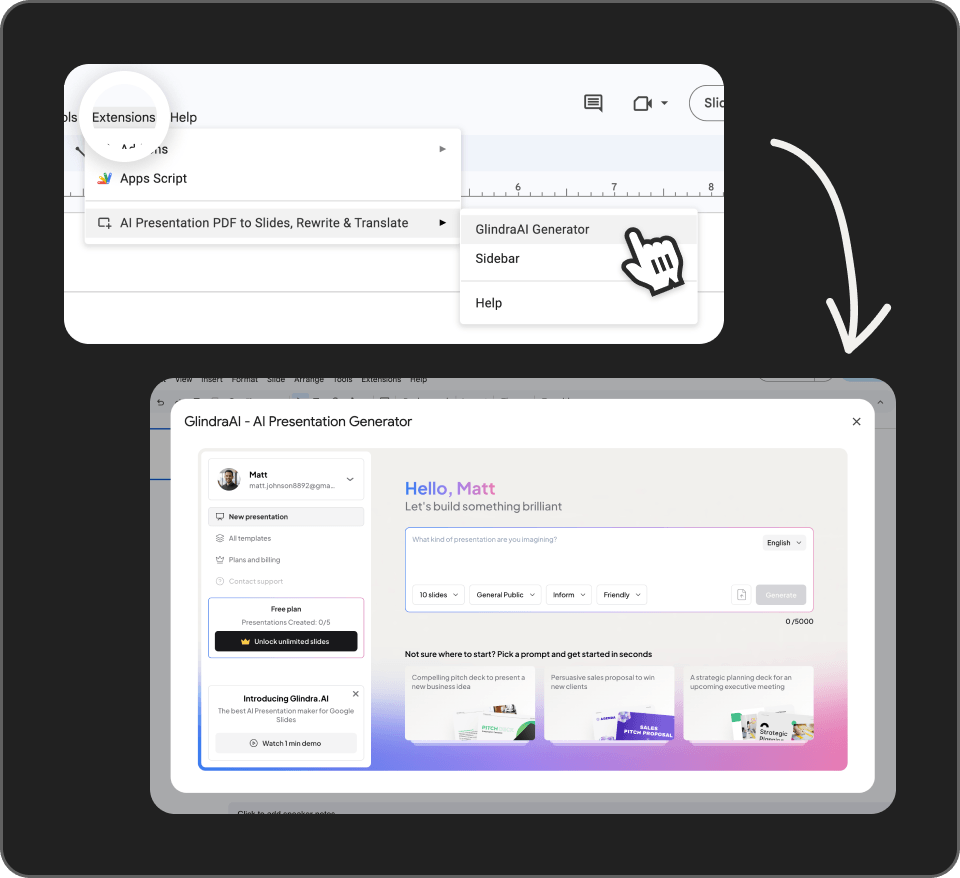
4. Create your first presentation
Inside the GlindraAI Generator window:
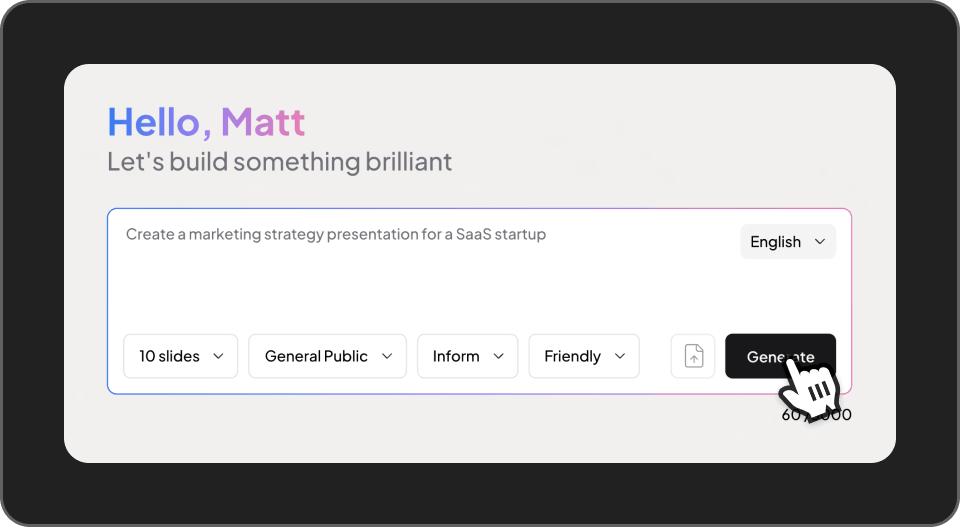
1. In the prompt box, type what presentation you want to create.
Example:
1. In the prompt box, type what presentation you want to create.
Example:
prompt
"Create a marketing strategy presentation for a SaaS startup"
2. Choose your settings:
-Slides (example: 10 slides)
-Audience (example: General Public)
-Purpose (example: Inform)
-Tone (example: Friendly)
-Language
3. Click Generate.
Glindra will automatically create the slides in your Google Slides presentation.
-Slides (example: 10 slides)
-Audience (example: General Public)
-Purpose (example: Inform)
-Tone (example: Friendly)
-Language
3. Click Generate.
Glindra will automatically create the slides in your Google Slides presentation.
5. Alternative: start from a prompt template
If you are not sure what to write:
1. Scroll down in the generator.
2. Click one of the prompt cards, such as:
-Pitch deck
-Sales proposal
-Strategic planning presentation
3. The prompt will autofill.
4. Click Generate.
1. Scroll down in the generator.
2. Click one of the prompt cards, such as:
-Pitch deck
-Sales proposal
-Strategic planning presentation
3. The prompt will autofill.
4. Click Generate.

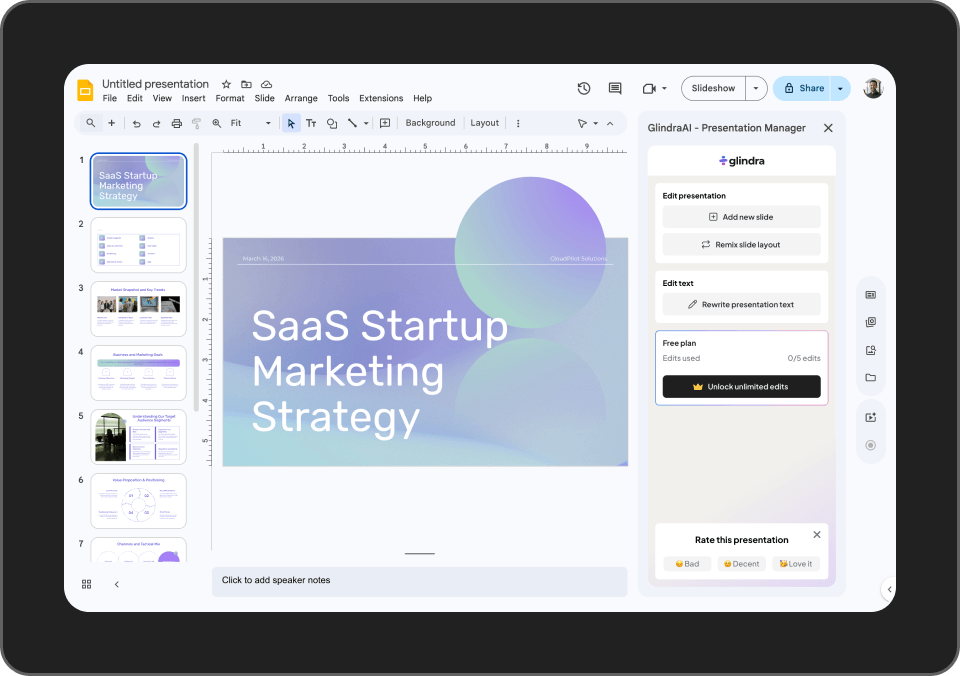
6. Review and edit
After generation:
-Review the slides created by Glindra.
-Edit text or titles if needed.
-Add images, charts, or visuals.
-Reorder slides if necessary.
Your presentation is now ready to present or export.
-Review the slides created by Glindra.
-Edit text or titles if needed.
-Add images, charts, or visuals.
-Reorder slides if necessary.
Your presentation is now ready to present or export.